Lallis and Higgins Blog


Recent Posts


Archive

Fire Safety Tips for Renters & Landlords

- Tuesday, March 25, 2025
Lallis & Higgins Insurance - Fire Safety in Weymouth, Quincy, MA

As moving season heats up across the United States, renters should take key steps to help protect their home and family. Smoke alarms help provide an early warning in the event of a fire emergency. However, a significant percentage of renters claim not to have a smoke alarm in their home or test their alarms regularly*.

Residential rental property owners and their tenants share the responsibility to ensure adequate protection against the threats of smoke and fire. Smoke alarms are widely required across housing types in the United States, and many jurisdictions further require carbon monoxide alarms. Working together, property owners and tenants may establish regular maintenance like battery replacement and equipment testing schedules to help reduce risk.

Signing a new lease or renewing a current one is an opportune time for property owners and tenants to take inventory of their alarms and make sure they are working properly, and to ensure tenants know what to do in case of an emergency.

Below are some fire safety tips for renters and property owners to help guide discussions between property owners and tenants, ultimately ensuring that both parties are ready for the unexpected:

1. Every level, every bedroom

The National Fire Protection Association (NFPA) recommends that smoke alarms be installed on every level of the home, including the basement, and inside each bedroom. It's also important to keep CO, known as the "silent killer," in mind. CO is a colorless, odorless and tasteless gas that can be potentially poisonous. The only way to detect a CO leak is with working CO alarms, which should be installed on every level and near all sleeping areas.

2. Test and maintain

Once alarms are installed, an important fire safety tip for renters and property owners is to maintain them by testing them regularly and replacing the batteries at least every six months. For a battery that lasts the life of the alarm and for convenient protection, install 10-year sealed battery alarms, like the First Alert 10-Year Sealed Battery Smoke and CO Alarm. 10-Year sealed battery alarms eliminate the need to replace the batteries and late-night battery chirps for a decade.

3. Alarms don't last forever

Be sure to replace outdated units. If you cannot remember the last time you installed an alarm, chances are, it's time to replace it. Alarms are on duty 24/7 and need to be replaced every 10 years.

4. P.A.S.S. the fire extinguisher

Beyond alarms, having fire extinguishers – and knowing how to use them – is an important fire safety tip for renters to help maintain a safe residence. When you need to act quickly, a simple way to remember how to use a fire extinguisher is with the acronym P.A.S.S. Simply pull the pin, aim the nozzle at the base of the fire, squeeze the trigger and sweep from side to side. Place fire extinguishers in common areas such as the kitchen, the garage and on every level of the home. Once your home is properly equipped, check to make sure that they're in working condition and are not damaged, dented or rusted.

Properly installed and regularly maintained fire safety equipment is key to maintaining a safe household.

Source: firstalert.com


What are the Origins of St. Patrick’s Day?

- Monday, March 17, 2025
Lallis & Higgins Insurance - St. Patrick's Day

What are the Origins of St. Patrick’s Day, the patron saint of Ireland. Born in Roman Britain in the late 4th century, he was kidnapped at the age of 16 and taken to Ireland as a slave. He escaped but returned about 432 ce to convert the Irish to Christianity. By the time of his death on March 17, 461, he had established monasteries, churches, and schools. Many legends grew up around him—for example, that he drove the snakes out of Ireland and used the shamrock to explain the Trinity. Ireland came to celebrate his day with religious services and feasts.

St. Patrick's Day

It was emigrants, particularly to the United States, who transformed St. Patrick’s Day into a largely secular holiday of revelry and celebration of things Irish. Cities with large numbers of Irish immigrants, who often wielded political power, staged the most extensive celebrations, which included elaborate parades. Boston held its first St. Patrick’s Day parade in 1737, followed by New York City in 1762. Since 1962 Chicago has colored its river green to mark the holiday. (Although blue was the color traditionally associated with St. Patrick, green is now commonly connected with the day.) Irish and non-Irish alike commonly participate in the “wearing of the green”—sporting an item of green clothing or a shamrock, the Irish national plant, in the lapel. Corned beef and cabbage are associated with the holiday, and even beer is sometimes dyed green to celebrate the day. Although some of these practices eventually were adopted by the Irish themselves, they did so largely for the benefit of tourists.

Happy St. Patrick's Day from Lallis & Higgins Insurance!

Source: britannica.com/


REAL ID Deadline is Fast Approaching in MA!

- Tuesday, March 11, 2025
Lallis & Higgins Insurance - REAL ID Deadline

Are you REAL ID ready? On May 7, 2025, U.S. travelers must be REAL ID compliant to board domestic flights and access certain federal facilities.

Beginning May 7, 2025, every air traveler 18 years of age and older will need a REAL ID compliant driver’s license or identification card, or another TSA-acceptable form of identification, for domestic air travel and to enter certain federal facilities. TSA publishes a list of its acceptable identification documents on its website at tsa.gov/real-id.

Are you cleared for takeoff?

If you want to use your license or ID card to fly, gather your REAL ID required identity documents – most customers need to show just four documents* proving lawful presence in the United States, their SSN, and residency in Massachusetts.

Customers who have changed their name need to show additional proof documents. Do you need more information? You can find it here.

Mass.gov


Landlord's Guide to Pest Control in Rental Properties

- Tuesday, February 25, 2025
Lallis & Higgins Insurance - Pest Control

Pests in a rental property can cause conflict between tenants and landlords.

Below is a helpful guide to pest management in rental properties for landlords and property managers. Questions about who is responsible (and should pay) for pest control and how to tackle a pest infestation, protect your property and save money are answered below.

Pest management – an issue that can’t be swept under the carpet

When you are a landlord or a property manager, sooner or later, you’ll be contacted about the presence of pests on your property. Regardless of who is responsible for the pest infestation, it’s crucial to address the situation quickly. If left unchecked, pests can cause structural damage to the property, recurrent complaints by tenants, possible turnover of renters, loss of revenue, and health issues for people and their pets.

Is pest control a landlord’s or tenant’s responsibility?

In rental properties, the landlord or property manager is responsible for pest control unless they can prove the tenant caused the infestation. However, each state has different legislation that you should refer to before turning down your tenants’ requests or taking legal action against them. You should also check if there was a pest control clause in the lease agreement you could enforce.

The landlord or property manager is responsible for keeping common areas in a clean and safe condition. Organizing rubbish bin collections and large pick-ups are part of the property owner’s responsibilities. Failing to keep the common areas free of rubbish can be used as ammunition by tenants, as unsanitary and untidy conditions can attract and harbor pests.

Who pays for pest control, the landlord or the tenant?

Once you have determined who is liable for pest control, the tenant or the landlord, the responsible party should cover the financial costs. If the landlord can prove that the tenants’ living conditions are responsible for the infestation, the bill falls to the renters. However, since time is of the essence, it’s better to cover the costs first and sort out the financial issue later if the tenants push back on paying for the extermination.

Preventative pest control in multi-family buildings is often an expectation and responsibility of HOAs and condo associations. If a pest control plan for the building isn’t in place, the tenants will likely use this to void any financial responsibility. So, if you manage or own an apartment block or large building, sign up for a regular pest control plan to safeguard your property and your finances.

Can you evict a tenant for causing a pest infestation?

In most U.S. states, you cannot evict a tenant on the grounds of being responsible for a pest infestation. You can charge them for the pest control intervention and issue a “notice to comply or quit” to warn them that they are in violation of the lease agreement and will be evicted if the situation isn’t fixed.

Check your State Laws, but, generally speaking, you will need to go to court and prove that living conditions are causing a health hazard or extensive property damage to evict a non-compliant tenant. As a landlord or property manager, you should consider alternative solutions to litigations first, as you will likely resolve the issue in a shorter time frame.

What to do if your tenants report a pest infestation in the rental property?

So, you just received a distress call from a tenant reporting ants, bed bugs, cockroaches, or other unsightly pests. What should you do next?

Can you take matters into your own hands?

If you are the building superintendent, property manager, or landlord, your first reaction might be to exterminate the critters yourself, but you would be breaking the law by doing so.

There are specific regulations and laws around the use of pesticides in all settings, including residential properties. A person may only apply pesticides to the individual dwelling unit (e.g., house or apartment) in which they reside unless they are a certified commercial applicator. You should call a professional pest control company as soon as possible.

Organize a professional pest control visit

Regardless of who is responsible, your first action should be eradicating the pest. Always be prepared to front the bill for pest problems, so they are resolved quickly. A good rental property expense budget should always include preventative maintenance and emergency measures to avoid nasty surprises when fighting pest infestations.

During the process, keep the tenant informed of the progress in witing. This way, if there is any dispute later on regarding the timeliness of your actions or communications, you will be standing on solid footing.

How much time does a landlord have to take care of a pest infestation?

It’s essential to act swiftly once you have been notified of a pest problem in your rental property. You should at least book the visit from a pest control company within one to two days. If you take too long, your tenant can take actions such as withholding rent, moving into temporary housing, or breaking the lease.

Even if you think you shouldn’t be paying for it, it is best to be proactive about the infestation.

Source: Hawkspestcontrol.com


How to Reduce Pest Control Costs in Rentals

- Wednesday, February 19, 2025
Lallis & Higgins Insurance - Pest Control

Preventing pest infestations is easier and cheaper than eradicating one. Here are three things you should be doing to keep your rental property pest free.

1. Regular visits and inspections

Inspect your rental properties at least yearly. Monitor the condition of the interiors and check for any entry points pests might use. If there is an outdoor area, ensure the vegetation is well-maintained, and you can’t see pest droppings on the ground. Tidiness and cleanliness are great pest-deterrents, and a landlord’s visit often results in the tenants doing a deep clean. If the area is prone to pest infestations or you have had issues with that property before, consider bringing a pest control specialist with you on these visits.

2. Pest prevention education

When signing the lease, talk to the tenants about their responsibilities and how they can avoid pest infestations. Forming a genuine connection during a face-to-face conversation helps them feel responsible for the property they live in, which can encourage tenants to take better care of the rental. When a new occupant moves in, it is the perfect time to go over scenarios in which they will be held accountable for any pest control cost incurred and which actions are to be avoided as they attract common pests.

3. Preventative pest control spraying

Don’t leave seasonal pest control up to the tenant. It might not get done at all or not to your satisfaction. Protecting your property from any serious damage caused by invasive pests is in your best interest. Put an agreement in place with your local pest control experts to regularly visit your property and prevent any pest invasion from developing. If you are working with or considering hiring a property managing agency, ask them what type of pest control they do. A small recurring expense can result in significant savings down the line.

Source: hawxpestcontrol.com


Fire Safety Tips for Renters & Property Owners

- Wednesday, February 12, 2025
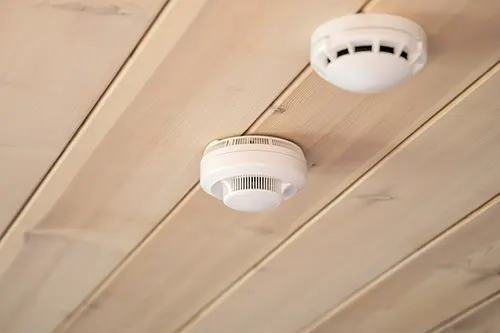
Lallis & Higgins Insurance - Fire Sensors

As moving season heats up across the United States, renters should take key steps to help protect their home and family. Smoke alarms help provide an early warning in the event of a fire emergency. However, a significant percentage of renters claim not to have a smoke alarm in their home or test their alarms regularly.

Residential rental property owners and their tenants share the responsibility to ensure adequate protection against the threats of smoke and fire. Smoke alarms are widely required across housing types in the United States, and many jurisdictions further require carbon monoxide alarms. Working together, property owners and tenants may establish regular maintenance like battery replacement and equipment testing schedules to help reduce risk.

Signing a new lease or renewing a current one is an opportune time for property owners and tenants to take inventory of their alarms and make sure they are working properly, and to ensure tenants know what to do in case of an emergency.

Below are some fire safety tips for renters and property owners to help guide discussions between property owners and tenants, ultimately ensuring that both parties are ready for the unexpected:

1. Every level, every bedroom

The National Fire Protection Association (NFPA) recommends that smoke alarms be installed on every level of the home, including the basement, and inside each bedroom. It's also important to keep CO in mind. CO is a colorless, odorless and tasteless gas that can be potentially poisonous. The only way to detect a CO leak is with working CO alarms, which should be installed on every level and near all sleeping areas.

2. Test and maintain

Once alarms are installed, an important fire safety tip for renters and property owners is to maintain them by testing them regularly and replacing the batteries at least every six months. For a battery that lasts the life of the alarm and for convenient protection, install 10-year sealed battery alarms. 10-Year sealed battery alarms eliminate the need to replace the batteries and late-night battery chirps for a decade.

3. Alarms don't last forever

Be sure to replace outdated units. If you cannot remember the last time you installed an alarm, chances are, it's time to replace it. Alarms are on duty 24/7 and need to be replaced every 10 years.

4. P.A.S.S. the fire extinguisher

Beyond alarms, having fire extinguishers – and knowing how to use them – is an important fire safety tip for renters to help maintain a safe residence. When you need to act quickly, a simple way to remember how to use a fire extinguisher is with the acronym P.A.S.S. Simply pull the pin, aim the nozzle at the base of the fire, squeeze the trigger and sweep from side to side. Place fire extinguishers in common areas such as the kitchen, the garage and on every level of the home. Once your home is properly equipped, check to make sure that they're in working condition and are not damaged, dented or rusted.

Properly installed and regularly maintained fire safety equipment is key to maintaining a safe household.

Source: firstalert.com


Traditional & Romantic First Valentine's Day Dates

- Wednesday, February 05, 2025
Lallis & Higgins Insurance - Valentine's Day Date

Traditional First Valentine's Day Date Ideas

Making new traditions is one of the sweetest things to do with your new boo. But, since you're still getting to know each other, you may feel unsure about what they'd enjoy the most. The best way to find out is to ask them, but if they aren't sure, a traditional romantic date will do the trick!

If you need help deciding what to do, try a traditional romantic idea—and look for ways to add a personal touch.

Go out for a fancy dinner together. Ask what fancy restaurant they love and make reservations well in advance. Dressing up, sharing a fancy bottle of wine, and chatting in a beautiful setting is always memorable and exciting. Spend the weekend away. Plan a getaway at a fancy hotel or bed and breakfast. Order room service, sneak in early to sprinkle some rose petals on the bed, and pack a special card and gift.

Go to a romantic spot & exchange gifts. Whether in a restaurant, a beautiful overlook, or a park, you can enjoy each other's company in a lovely

Romantic First Valentine's Day Date Ideas

The most romantic first Valentine's Day dates blend silly, sweet, and sexy moments. So, if you want to up the ante, find a way to combine playful and endearing moments that will fan the flame of your love.

Enjoy a romantic game together. Purchase a fun card game for couples—some focus on getting to know each other more, and others are more adventurous bedroom games.

Two words: couples' massage. Hit the spa together and experience a couple's massage. Try to find a hotel with a spa package so you can enjoy some calming, romantic time together—and you don't have to hurry home!

Play with puppies at the SPCA. And maybe adopt one? If your S.O. loves animals, visit the animal shelter to play with the dogs or cats. (Just be prepared to potentially bring a new pet home.)

Source: setting.lovepop.com


How to Avoid a Blind Spot Car Accident

- Friday, January 31, 2025
Lallis and Higgins Insurance

Depending on your vehicle and the position of your mirrors, it may not be possible to completely eliminate blind spots. There are steps you can take to help reduce the risk of an accident, however.

Adjust Your Mirrors

When you slide behind the wheel, ensure that your mirrors are correctly positioned. If you’re driving in a rental car, or someone has adjusted your mirrors, perform the following steps before you start driving.

  • Move the rear view mirror until you have the best view directly behind your vehicle. You should make the adjustments with your head in its usual driving position.
  • Lean your head across until it’s against your driver’s side window. Adjust the driver’s side mirror until you see the side of your car. When you sit back in a normal position, you should not be able to see any of your car’s bodywork in the mirror. You need to be able to see other cars, not your own.
  • Now lean the other way until your head is in the center of the car, in line with the middle of the rear view mirror. Adjust the passenger’s side mirror until you can see the side of your vehicle. When you sit back in your normal position, you should not be able to see any of the car’s bodywork in the mirror.
  • Your mirrors are now in the optimum position. You may still have a small blind spot, but it will be much smaller than if your mirrors were set up incorrectly.

Some modern cars now have what is known as mirror memory. It allows you to position your mirrors perfectly, and then save their position into the car’s memory. You can then return your mirrors to the exact same position with a push of the button.

This is particularly useful if you share your car with someone else who requires the mirrors to be in different positions.

Know Your Blind Spot

Once you have your mirrors set up to the correct position, you may still find that you have a small blind spot.

Learn exactly where your blind spot is, and how big it is. This will make you safer when on the roads because you’ll know the area that you need to watch.

The easiest way to find the size and position of your blind spot is to get out on the road. In your rear view mirror, find a car that is behind you, but is in the process of passing you. Watch it in your rear view mirror as it approaches and notice when it enters the view from your side mirrors.

You should be able to determine the exact point at which it disappears from both your rear view and your side mirrors. Now count seconds in your head until you see the car in your peripheral vision. This should be no more than one or two seconds, provided that the car is not passing you at almost the same speed you are traveling.

Try this a few times and determine the longest amount of time that any vehicle remains in your blind spot.

Wait to Pull Out

Now that you know how long vehicles are typically in your blind spot, you can reduce your risk of an accident by waiting for at least this long before changing lanes.

For example, if you notice that cars tend to be in your blind spot for two seconds at most, then when it comes time to change lanes, check both your rear view and side mirrors. If you don’t see anything, wait another two seconds before you pull out. This should give enough time for any cars that were in your blind spot to become visible again.

We always advise taking plenty of time to make your move into the next lane.

Look Over Your Shoulder

Another technique when dealing with blind spots while driving is to look over your shoulder.

If you cannot see a car in your mirrors, you should still be able to see it through the side windows. Because of the position of the most common blind spots, you will need to look over your left shoulder to do this.

Keep in mind that while looking back may reduce the risk of a blind spot accident, it could increase your risk of hitting the car in front. Always be aware of your surroundings. If you are in tight traffic, stay safe by being selective when looking over your shoulder.

Use Technology

As mentioned earlier, well as thinking about your own blind spot, you should also and take into account the blind spots of other drivers. They may not be so aware of the problem as you now are, and they may try to pull out when you are driving in their blind spot.

If you are passing another car, avoid matching their speed too closely. This will cause you to remain in their blind spot for longer than if you were passing them more quickly. The less time you can spend in their blind spot the better.

Also take into account the blind spots of vehicles that cannot see directly behind them, such as large trucks, tractor trailers, big rigs or station wagons that are full right up to the roof. These drivers will only be able to see you in their side mirrors, so if you are too close behind them, you will be in a large blind spot.

They may brake suddenly, not realizing you are there. If you are traveling close behind them, you will have little time to avoid a collision.

Source: drivesafeonline.org


MassDOT Alerts Customers of Smishing Scam

- Wednesday, January 22, 2025
Lallis & Higgins Insurance - Smishing Scam

Dear EZDriveMA Customer,

The Massachusetts Department of Transportation (MassDOT) was alerted that a text message-based scam, also known as smishing, is fraudulently claiming to represent tolling agencies from across the country. The scammers are claiming to represent the tolling agency and requesting payment for unpaid tolls.

MassDOT urges customers to be cautious about email, text, and phone scams demanding payment of outstanding toll balances. Some attempts have been made to trick customers into sharing credit card numbers and other sensitive information by directing them to a website to pay their outstanding balances. MassDOT strongly encourages customers not to click the link contained in those messages.

Please Note: The targeted phone numbers seem to be chosen at random and are not uniquely associated with an account or usage of toll roads.

Customers who receive an unsolicited text, email, or similar message suggesting it is from EZDriveMA or another toll agency should not click on the link.

EZDriveMA customers can verify a valid text notification in several ways:

  • EZDriveMA will never send invoices by text
  • EZDriveMA will never request payment by text
  • All links associated with EZDriveMA will include www.EZDriveMA.com

This smishing scam is part of a series of smishing scams that the FBI is aware of: https://www.ic3.gov/PSA/2024/PSA240412

The FBI recommends individuals that receive the fraudulent messages do the following:

1. File a complaint with the IC3, https://www.ic3.gov/, be sure to include:

  • The phone number from where the text originated.
  • The website listed within the text

2. Check your account using the toll service's legitimate website.

3. Contact the toll service's customer service phone number.

4. Delete any smishing texts received.

5. If you clicked any link or provided your information, take efforts to secure your personal information and financial accounts. Dispute any unfamiliar charges.

We encourage all customers to stay alert to these types of scams and to contact us at https://www.ezdrivema.com/ with any questions about EZDriveMA notifications.


Get an insurance quote &
see how much you can save.